In my last course of computer vision and learning, I was working on a project to recognize between two styles of paintings. I decided to use the Adaboost algorithm [1]. I am going to describe the steps and code to make the algorithm run.
Step 0. The binary classification
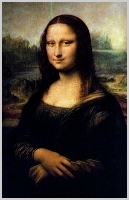
This is not a step, but you have to be clear that this algorithm is just for classifying two classes. For example, ones from zeros, faces from non-faces or, in my case, baroque from renaissance paintings.
Step 1. Prepare the files.
There are several ways of introducing the samples to the algorithm. I found that the easiest way was using simple csv files. Also, you DO NOT have to worry about dividing the samples in training or testing. Just put all in the same files, OpenCV is going to divide the set picking the training/testings samples automatically. Then it is a good idea to put all the samples of the first class at the beginning and the second class at the end.
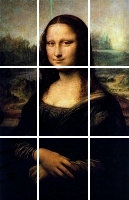
The format is very simple. The first column is going to be the category (however you can specify the exact column if your file does not follow this format). The rest of the columns are going to be the features of your problem. For example, I could have used three features. Each of them represent the average of red, blue and green per pixel in the image. So my csv file should look like this. Note that in the first column I am using a character. I recommend to do that so OpenCV is going to recognize that is a category (again you could specify that this a category an not a number).
B,124.34,45.4,12.4
B,64.14,45.23,3.23
B,42.32,125.41,23.8
R,224.4,35.34,163.87
R,14.55,12.423,89.67
...
NOTE: For a very strange reason the OpenCV implementation does not work with less than 11 samples. So this file should have at leas 11 rows. Just put some more to be sure and because you will need to specify a testing set as well.
Step 2. Opening the file
Let's suppose that the file is called "samples.csv" This would be the code:
 //1. Declare a structure to keep the data
CvMLData cvml;
//2. Read the file
cvml.read_csv("samples.csv");
//3. Indicate which column is the response
cvml.set_response_idx(0);
Step 3. Splitting the samples
Let's suppose that our file has 100 rows. This code would select 40 for the training.
 //1. Select 40 for the training
CvTrainTestSplit cvtts(40, true);
//2. Assign the division to the data
cvml.set_train_test_split(&cvtts);
Step 4. The training process
Let's suppose that I got 1000 features (columns in the csv after the response) and that I want to train the algorithm with just 100 (the second parameter in the next code)
 //1. Declare the classifier
CvBoost boost;
//2. Train it with 100 features
boost.train(&cvml, CvBoostParams(CvBoost::REAL, 100, 0, 1, false, 0), false);
The description of each of the arguments can be find here.
Step 5. Calculating the testing and training error
The error corresponds to the misclassified samples. Then, there could be two possible errors: the training and the testing.
 // 1. Declare a couple of vectors to save the predictions of each sample
std::vector train_responses, test_responses;
// 2. Calculate the training error
float fl1 = boost.calc_error(&cvml,CV_TRAIN_ERROR,&train_responses);
// 3. Calculate the test error
float fl2 = boost.calc_error(&cvml,CV_TEST_ERROR,&test_responses);
Note that the responses for each samples are saved in the train_responses and test_responses vectors. This is very useful to calculate confusion matrix (false positives, false negatives, true positives and false negatives and roc curves. I ll be posting how to build them with R.
Step 6. Save your classifier!!
You probably wouldn't mind at the beginning when it takes a few seconds to train something but you definitely don't want to lost it after a couple of hours or days that you waited for the results:
 // Save the trained classifier
boost.save("./trained_boost.xml", "boost");
Step 7. Compiling the whole code
The whole code is pasted at the end. To compile it, use this
g++ -ggdb `pkg-config --cflags opencv` -o `basename main` main.cpp `pkg-config --libs opencv`;
Here is the file with my code.
[1] http://citeseerx.ist.psu.edu/viewdoc/summary?doi=10.1.1.56.9855
#main.cpp
#include <cstdlib>
#include "opencv/cv.h"
#include "opencv/ml.h"
#include <vector>

using namespace std;
using namespace cv;
int main(int argc, char** argv) {

/* STEP 2. Opening the file */
//1. Declare a structure to keep the data
CvMLData cvml;
//2. Read the file
cvml.read_csv("samples.csv");
//3. Indicate which column is the response
cvml.set_response_idx(0);

/* STEP 3. Splitting the samples */
//1. Select 40 for the training
CvTrainTestSplit cvtts(40, true);
//2. Assign the division to the data
cvml.set_train_test_split(&cvtts);
printf("Training ... ");

/* STEP 4. The training */
//1. Declare the classifier
CvBoost boost;
//2. Train it with 100 features
boost.train(&cvml, CvBoostParams(CvBoost::REAL, 100, 0, 1, false, 0), false);

/* STEP 5. Calculating the testing and training error */
// 1. Declare a couple of vectors to save the predictions of each sample
std::vector train_responses, test_responses;
// 2. Calculate the training error
float fl1 = boost.calc_error(&cvml,CV_TRAIN_ERROR,&train_responses);
// 3. Calculate the test error
float fl2 = boost.calc_error(&cvml,CV_TEST_ERROR,&test_responses);
printf("Error train %f n", fl1);
printf("Error test %f n", fl2);

/* STEP 6. Save your classifier */
// Save the trained classifier
boost.save("./trained_boost.xml", "boost");

return EXIT_SUCCESS;
}