In my previous post, I explained the use of to_window and to_widget property as a way of transforming relative coordinates to absolute coordinates. In this post I will explain how do we transform coordinates between a particular widget and its parent. Basically, we just need to use the to_parent and to_local methods instead. However, these methods causes much more confusion than the transformation into absolute coordinates.

Let's work with exactly the same example of the previous post. Following is the Kivy language code.

<RelativeLayout>:
    pos: 100,100
    size_hint: .6,.6
    canvas:
        Line:
            rectangle: 0,0, self.width, self.height

<Relatives>:
    RelativeLayout:
        Button:
            pos: 0,0
            size_hint: .4,.3
            text: "Press Me!"
            on_press: text = root.test(*args)

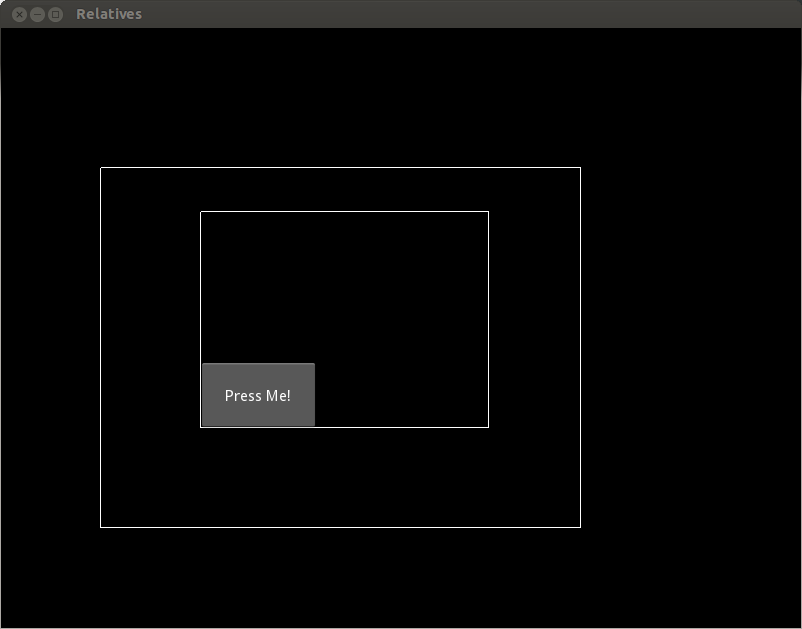
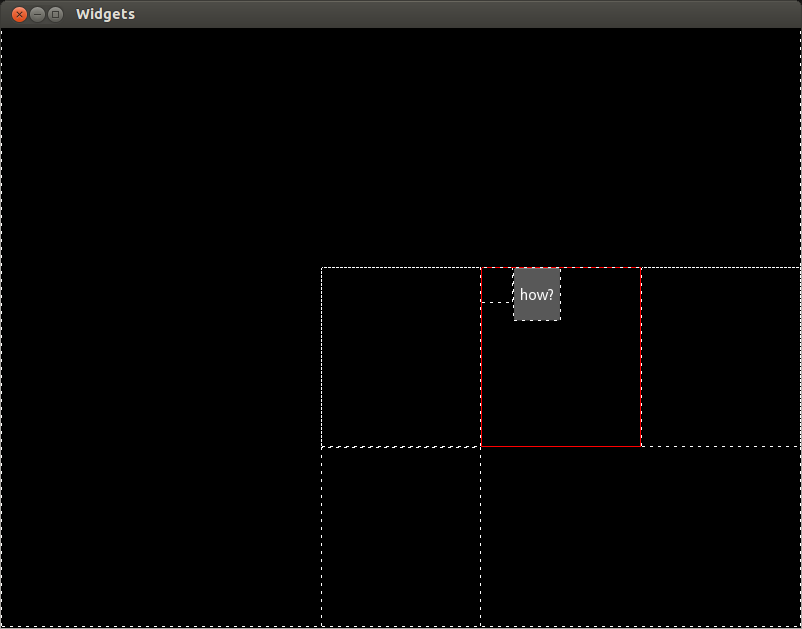
Here is the output of that code:

Screenshot from 2013-10-11 23:22:15

And following is the Python code, in which we just changed the to_window and to_widget methods for to_parent and to_local respectively.

from kivy.app import App
from kivy.uix.relativelayout import RelativeLayout

class Relatives (RelativeLayout):
    def test(self, inst):

        print "inst.pos = " + str(inst.pos)

        to_parent = inst.to_parent(*inst.pos)
        print "to_parent = " + str(to_parent)

        to_local = inst.to_local(*to_parent)
        print "to_local = " + str(to_local)

class RelativesApp(App):
    def build(self):
        return Relatives()

RelativesApp().run()

When we press the Button instance, we get the following output in the terminal.

inst.pos = [0, 0]
to_parent = (0, 0)
to_local = (0, 0)

It seems like it didn't work because the to_parent output is the same. Why? Let's give this a second thought. The coordinate inst.pos is the position where the Button instance is located relative to its parent. So, we already have a coordinate relative to its parent. When we call on the to_parent method, we are actually requesting the coordinate on the same coordinate system.

Most of the time, what we probably want is obtaining the coordinate on the parent's coordinate system. So instead on calling on inst.to_parent, we should call on the inst.parent.to_parent. Equivalently, we need to call on inst.parent.to_local, instead of just inst.to_local. The following code contains the correction.

from kivy.app import App
from kivy.uix.relativelayout import RelativeLayout

class Relatives (RelativeLayout):
    def test(self, inst):

        print "inst.pos = " + str(inst.pos)

        to_parent = inst.parent.to_parent(*inst.pos)
        print "to_parent = " + str(to_parent)

        to_local = inst.parent.to_local(*to_parent)
        print "to_local = " + str(to_local)

class RelativesApp(App):
    def build(self):
        return Relatives()

RelativesApp().run()

And here is the output.

inst.pos = [0, 0]
to_parent = (100, 100)
to_local = (0, 0)

Now, we are getting coordinates relative to Relatives as you might be expecting.

Just to make sure you understand, please try the following exercise. For the above example, would the statement print str(inst.parent.parent.to_parent(*inst.pos)) print the same terminal output as print str(inst.to_window(*inst.pos))?

Think about it before read the answer.

Answer: Since we are sending the coordinate (0, 0) directly as parameter to the Relatives instance without a way to specify that it initially belong to the Button instance, then the answer is no. In fact, in this particular case, the output is exactly the same.

Maybe it is clearer if I you just check the following code which is the real equivalent to print str(inst.to_window(*inst.pos)).

to_parent = inst.parent.to_parent(*inst.pos)
print inst.parent.parent.to_parent(*to_parent)

As you can see, there are two steps to get to the absolute coordinates traversing the relative layouts. Of course, this just apply to this particular example of two relative layouts.

One common confusion in Kivy is the correct distinction between to_window, to_widget, to_local and to_parent methods. In this post I will focus in to_window and to_widget methods.

Kivy usually works with absolute coordinates, i.e. no matter where you are trying to position a Widget, the origin coordinate (0,0) will always be at the bottom-left corner of your window.

Please notice that this post applies specifically to the absolute position properties (pos, x, y, top, bottom), not to the proportional position property (pos_hint property) .

Apart from the pos_hint property, there are some exceptions where Kivy stops using absolute coordinates. For example, when we are directly inside a RelativeLayout or Scatter. In this cases, we might need to convert coordinates relative to the Widget to absolute Window coordinates, or vice-versa.

A common situation in which we need to do this is when we are receiving touch events. Let's study an example. Here is the Kivy code:

<RelativeLayout>:
    pos: 100,100
    size_hint: .6,.6
    canvas:
        Line:
            rectangle: 0,0, self.width, self.height

<Relatives>:
    RelativeLayout:
        Button:
            pos: 0,0
            size_hint: .4,.3
            text: "Press Me!"
            on_press: text = root.test(*args)

What we have is a Button inside a RelativeLayout inside Relatives. A Relatives instance will be the the main Widget of the Window, and therefore it will share its absolute coordinates. Here is a screenshot of the example:

Screenshot from 2013-10-11 23:22:15

The following is the Python code which is going to print the coordinates of to_window and to_widget in the test method:

import kivy
kivy.require('1.7.0')

from kivy.app import App
from kivy.uix.relativelayout import RelativeLayout

class Relatives (RelativeLayout):
    def test(self, inst):

        print "inst.pos = " + str(inst.pos)

        to_window = inst.to_window(*inst.pos)
        print "to_window = " + str(to_window)

        to_widget = inst.to_widget(*to_window)

        print "to_widget = " + str(to_widget)

class RelativesApp(App):
    def build(self):
        return Relatives()

RelativesApp().run()

This is the output of the program:

inst.pos = [0, 0]
to_window = (200, 200)
to_widget = (0, 0)

The initial position of the Button is (0,0), relative to the RelativeLayout. When to_window is called on, the relative coordinate is transformed into an absolute one (200,200). The Button is inside two RelativeLayouts instances. Each of one is at the position (100,100). Relatives is at (100,100) of the Window and the insider RelativeLayout is at (100,100) of the Relatives instance. Therefore the Button is at (200,200) of the Window. The coordinate is restored calling the to_widget method.

The to_window method will always return absolute coordinates relative to the Window, no matter how many RelativeLayout (or Scatter) instances are in the middle. In other words, if there are several RelativeLayout instances embedded into each other, the method will traverse them until it gets the coordinates in the Window.

I will be posting about to_parent and to_local methods very soon.

Have you ever wonder where did a Widget go in Kivy?

For efficiency reasons, the Kivy basic widgets are meant to be as simple as possible, and this is why they have no background colour or borders. Then, it is basically impossible to tell where they are by just observing the screen. The feature is good (efficiency first) but sometimes it makes it very difficult to tell what is happening when things didn't go as we expected.

Since there is no WYSIWYG (What You See Is What You Get) available for Kivy, and hopefully never : D (because they generate horrible code) There is already a WYSIWYG: it is called Kivy-Designer (I will tell you about it as soon as I get to use it). However, most of us just prefer to do it ourself because we believe we are able to produce better code and be in complete control of it.

In this case, what can we use something instead for debugging? You can use the inspector (see the comment by Ben). The problem persist in the sense that you don't have a constant whole picture of what is happening. So, here is my tip to know have a better understanding in the invisible widgets Kivy world.

Let's start looking at the codes to illustrate the problem. The first one is the main.py:

from kivy.app import App
from kivy.uix.floatlayout import FloatLayout

class Widgets (FloatLayout):
    pass

class WidgetsApp(App):
    def build(self):
        return Widgets()

WidgetsApp().run()

There shouldn't be anything to explain there, but you can always ask me. Here is the widgets.kv:

<Widgets>:
    AnchorLayout:
        anchor_x: 'right'
        anchor_y: 'bottom'
        GridLayout:
            cols: 3
            size_hint: .6,.6
            Label:
            StackLayout:
                orientation: 'lr-tb'
                Widget:
                    size_hint: .2,.2
                Button:
                    size_hint: .3,.3
                    text: "how?"
            Widget:
            Widget:

And here it a resulting screenshot:

Screenshot from 2013-10-02 18:15:54

The question is how did that button get there? At this point, you probably would prefer to take a pencil and try to sketch the small mess I did in the code. It would be nice if we could draw a Line at the border of the widgets using the Canvas. You probably don't want to go Widget by Widget adding the necessary instruction. Let's then redefine the Widget class rules. I just added the <Widget> to the widgetst.kv file:

<Widget>:
    canvas.after:
        Line:
            rectangle: self.x+1,self.y+1,self.width-1,self.height-1
            dash_offset: 5
            dash_length: 3

<Widgets>:
    AnchorLayout:
        anchor_x: 'right'
        anchor_y: 'bottom'
        GridLayout:
            cols: 3
            size_hint: .6,.6
            Label:
            StackLayout:
                orientation: 'lr-tb'
                Widget:
                    size_hint: .2,.2
                Button:
                    size_hint: .3,.3
                    text: "how?"
            Widget:
            Widget:

Here is the resulting screenshot:

Screenshot from 2013-10-02 18:13:23

I hope you think it is neat. It was my little inspiration moment of the year. I just took advantage of inheritance and the Kivy rules to overwrite the base class of all widgets.

What is important is the concept. So, here it is an extra example. What happen if you want to know where is one type of widgets? For example, let's say a the StackLayout instances:

<Widget>:
    canvas.after:
        Line:
            rectangle: self.x+1,self.y+1,self.width-1,self.height-1
            dash_offset: 5
            dash_length: 3
<StackLayout>:
    canvas.after:
        Color:
            rgb: 1,0,0
        Line:
            rectangle: self.x+1,self.y+1,self.width-1,self.height-1
        Color:
            rgb: 1,1,1ot

<Widgets>:
    AnchorLayout:
        anchor_x: 'right'
        anchor_y: 'bottom'
        GridLayout:
            cols: 3
            size_hint: .6,.6
            Label:
            StackLayout:
                orientation: 'lr-tb'
                Widget:
                    size_hint: .2,.2
                Button:
                    size_hint: .3,.3
                    text: "how?"
            Widget:
            Widget:

Please note that in this case I didn't use the dash attributes of line. I also used a different color, so it is easy to tell where the StackLayout intances are. Here is the final screenshot:

Screenshot from 2013-10-02 18:15:40

I hope you find this as helpful as I have found for programming my interfaces. Continue Kivying!

bookI have been working in this book for a while already. This is why I have been posting so much about Kivy lately and I will continue doing. The posts are a complement to the book and some very interesting ideas that I have learned during the process. It is also a way collaborate to the amazing job that Mathieu Virbel and his team are doing with this platform. And, of course, it is also a way to promote my book to recover the time investment made on it.

I have seen Kivy growing faster and faster, and I am positive that it will become a main competitor in the market of the mobile application development. As the second-last Twitter post says:

"How come #Kivy is not one of the most spoken about #Python projects? Cross-platform mobile app development in Python!".

I cannot agree more. Kivy is still just being discovered and it's simple fabulous. There are many good reasons to say that, but I will just highlight the ones that I consider most important, just in case you haven't heard about it:

  1. It is cross platform. I haven't found anything more compatible than Kivy. It runs in Linux, Windows, MacOSX, Android and IOS; and recently in Raspberry.
  2. Built-in interactivity. Many of the features you expect to see in a mobile application are ready-to-use in Kivy: multi-touch support, gestures, all sorts of keyboards, touch and clock events (including the magical Kivy properties), animations.
  3. It is Python. Ok, you may say this is a bit subjective. I have worked with Java, C++, PHP and others, and just a couple of years ago with Python. It does make a difference

It feels like a short and long process at the same. It was one year and a half ago when Mathieu wrote me about an already old post to help them with the documentation. I would have loved to participate but I was really busy with uni. However, when Pack Publishing contacted me because of exactly the same post (it is strange that somehow we hit the right spot on the internet and a post suddenly scale on searches, the post is quite bad to be honest but I was lucky), it was a very different scenario

This time I was quitting the university and just thinking to free lance and having a more formal blog. So, it just came on the right place and the story a success. The book is already available. I hope those that get to buy it, enjoy as much as I enjoy writing it.

I will continue doing Kivy posts. I hope more often now that the book is not sucking my time. Feel free to write me about any question related to the book or, well, anything in general. I have been also replying some questions in [StackOverflow](http://stackoverflow.com/users/1060349/toto-tico), so you can just post there were I frequently hang around.

As for today, I am glad of contributing with this great project. Thanks to the editorial and its team, and thanks to the Kivy team for this great library.

Long live to Kivy!

I have been insisting in the importance of PushMatrix and PopMatrix to control the use of the canvas in Kivy in:

In today's post I explain a very specific example of how to rotate an Image without affecting the whole interface. I start with the common problem that the novice will experience and explain how to fix it:


1. The Initial Interface:

This is the screenshot of the interface we are going to work with. We want to rotate the image on the top-right of the layout.

GridLayout with one Button (top-left)
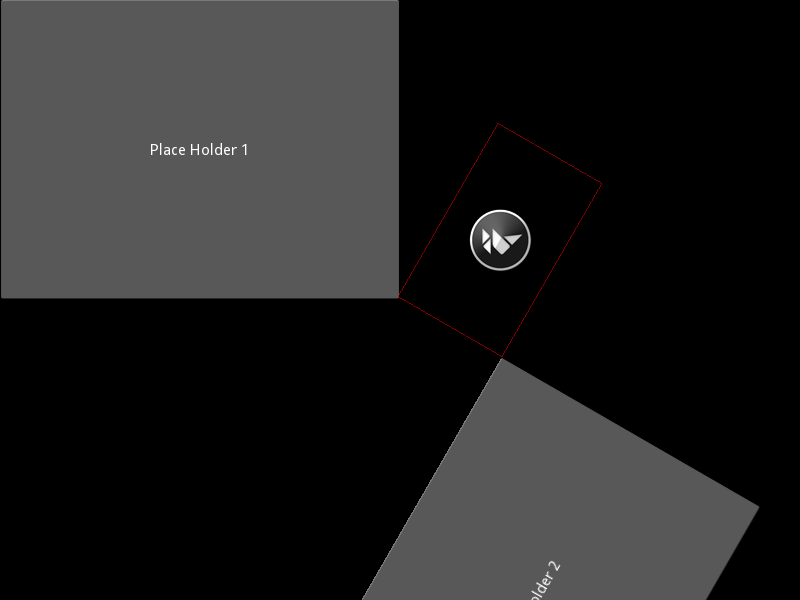
, one Image (top-right) and another Button (bottom-left)

This is the respective code:

from kivy.app import App
from kivy.uix.gridlayout import GridLayout
from kivy.lang import Builder

Builder.load_string("""
<KivyImage@Image>:
    source: 'kivy.png'
    pos: self.parent.pos
    size_hint: .5,.4
    canvas:
        Color:
            rgba: 1,0,0,.5
        Line:
            rectangle: self.x, self.y, self.width, self.height

<TestApp>:
    cols: 2
    Button:
        text: "Place Holder 1"
    FloatLayout:
        KivyImage:
    Button:
        text: "Place Holder 2"
""")

class TestApp(App, GridLayout):
    def build(self):
        return self

if __name__ == "__main__":
    TestApp().run()

The interface is very simple. A GridLayout with 2 columns and 3 widgets. A Button (Place Holder 1), a FloatLayout with an Image inside and another Button (Place Holder 2). The FloatLayout contains the KivyImage class that we are going to be working with. The KivyImage also contains a rectangular border as a reference to follow our notations.


2. The Problem:

The instruction we need to use for rotating is Rotate. We use three parameters for it: axis that sets the axis are we going to use for the rotation, usually z since; angle that sets the amount of degrees we want to rotate. After using the Rotate instruction, our code will look like this:

<KivyImage@Image>:
    source: 'kivy.png'
    pos: self.parent.pos
    size_hint: .5,.4
    canvas:
        Rotate:
            axis: 0,0,1
            angle: 60
            origin: self.center
        Color:
            rgba: 1,0,0,.5
        Line:
            rectangle: self.x, self.y, self.width, self.height

Here is the result:

After the Rotation

As you can see, after applying the instruction, everything is rotated (including the last Button). This means, that when we use context instructions (Scale, Rotate and Translate), the whole coordinate space is affected.

More over, our image didn't Rotate just the Rectangle!


3. Avoiding a global rotation:

We need to control the rotation, so the whole interface after the Rotate instruction is not affected. One way would be manually un-rotate with something like:

        Rotate:
            axis: 0,0,1
            angle: -60
            origin: self.center

Of course, that will be quite tedious. Instead, we are going to use two important instructions: PushMatrix, that saves the current context, and PopMatrix, that recovers the last saved context. Now the code looks like this:

<KivyImage@Image>:
    source: 'kivy.png'
    pos: self.parent.pos
    size_hint: .5,.4
    canvas:
        PushMatrix
        Rotate:
            axis: 0,0,1
            angle: 60
            origin: self.center
        Color:
            rgba: 1,0,0,.5
        Line:
            rectangle: self.x, self.y, self.width, self.height
        PopMatrix

And our new output should look like the following:

Using PushMatrix and Pop

Almost there, except that our images continues in the same original position. Let's finally Rotate the image.


4. Rotate the image for once!:

Sorry, I tell you why the image is not rotated. In the 2nd step, even though the whole context where rotated, the image didn't. The only explanation is that the Rotate where executed after the image is display on the screen.

Somehow, we need to guarantee that our Rotate instruction gets executed before. There is three sets of canvas instructions: canvas.before, canvas and canvas.after. Their names are intuitive, so let's reorganize our instructions:

<<KivyImage@Image>:
    source: 'kivy.png'
    pos: self.parent.pos
    size_hint: .5,.4
    canvas.before:
        PushMatrix
        Rotate:
            axis: 0,0,1
            angle: 60
            origin: self.center
    canvas:
        Color:
            rgba: 1,0,0,.5
        Line:
            rectangle: self.x, self.y, self.width, self.height
    canvas.after:
        PopMatrix

And finally we got our image rotated without affecting the rest of the interface:

Rotated Image

It is not strictly necessary to move the PopMatrix to the canvas.after section. The difference would be in the children of the image. In this case, it doesn't have. But in case it has children, then they will be rotated if the PopMatrix is in the canvas.after section.

Read more about the canvas in 10 things you should know about the Kivy canvas.